How to use FO Designer in Oracle Application Express 5
Introduction
Oracle application express can create a PDF file for your forms and
reports with just a few clicks, it allows you to configure the columns and
some aspect of the columns in the report, like color, fonts etc ...
however you cannot easily modify the layout of the report. A more flexible
and powerful solution is to create a XSL-FO file that defines the format
of the PDF files, however this can be very tedious even if you learn the
XSL-FO language.
J4L FO Designer is a visual tool that can create XSL-FO files you can
upload to Apex and use in your applications.
The procedure executed by Apex is:
- The data to be printed is converted to XML format
- the data is passed to the print server together with the XSL-FO file
(known as layout in Apex)
- the print server creates a PDF file using the previous files as
input.
Requirements
- Oracle Apex has been installed (we tested all versions from, 3.* to
5.*)
- A print server for Oracle Apex has been installed. Several
possibilities are available:
- Oracle Data Rest Services (APEX Listener)
- J4L Cloud FOP Server
- J4L on-premise FOP Server
- The print server has been configured in Oracle APEX.
Usage with Oracle REST Data Services
Starting with FO Designer version 1.6.1, the templates generated work
also with Oracle Rest Services print server. You can use this option if
you use Oracle REST Data Service (ORDS) as web server , either standalone
or inside a web server like Glassfish.
In the instance settings of APEX you have to select Oracle REST Data
Services as print server.

Installation of the J4L FOP print server
You can use the J4L FOP server as print server for Oracle Application
Express, either the on-premise or the Cloud version.
This is however NOT a requirement but our server provides extended FOP
functionality.
The fastest way to get a printing server up and running is by using our
cloud instance, use https://print.apex-reports.com/SaasFOP/Apex in
the instance configuration as below. Note if you need to use this long term, you need to contract a plan with us.
As an alternative you can install the test
on-premise server, or the professional one if you have a license
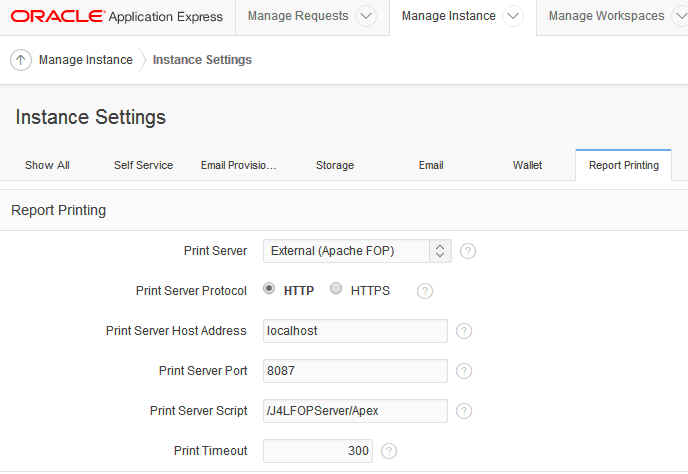
Login to Apex workspace INTERNAL as ADMIN user, select Manage Service
-> Instance settings -> Report printing and enter the
information of your print server. In the screenshot you can see the setup
(note we use port 8087 port in this example).
If you get this error while running a report:
ORA-20001: The printing engine could
not be reached because either the URL specified is incorrect or a proxy
URL needs to be specified.
This means APEX has no permission to access the FOP server (this is the
default setup in Oracle 11g) , please refer to the Oracle
documentation for enabling the network services.
Example step by step for APEX 5
Create the table
For our example we have installed the table TASKS contained in the file tasks.txt.
- Select from the Apex main menu Utilities-> Data load
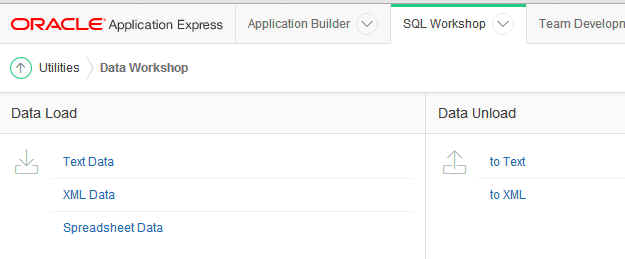
- Select "Spreadsheet data"
- Select new table and upload file, click next
- Select file tasks.txt and enter \t in the separator field,
click next
- Enter table name as TASKS, click next
- click load data
Now we have a table we want to generate a report for.
Create a Report Query
Before we can create a report in the FO Designer we need 2 items:
- the schema of the xml data to be printed.
- and an example xml file with sample data for testing.
this can be done by creating a report query in Apex:
- from the main menu select Shared Components -> Reports ->
Reports Queries
- select create
- enter report query name Tasks_Query, (select view as inline
if you want to display the PDF in the browser), click next

- Enter SQL query "select * from tasks", click next
- Select XML data checkbox and click download to save
the xml data file tasks_query.xml in your local drive
- Select XML Schema checkbox and click download to save
the xml schema file tasks_query.xsd in your local drive
- click "create report query" and finish.
You can now test the report, it will create a report based in the
generic format since we did not upload any custom layout yet.
Create the XSL-FO file using FO-Designer
Now you can start J4L FO Designer and design your report:
- start FO Designer and
- load the XML schema file (select ROWSET as root element)
- load the XML data file
- design your report and save it to
- export the XSL-FO file from the FO Designer
We have already done all this for you, in the FODesignerApexSample.zip
file you can find the following 4 files:
- tasks.xsd:schema file (xsd file)
- tasks.xml:data file for testing in FO Designer (xml file)
- tasks.xrp:FO designer report (xrp file). You can load this file
into the FO designer and click on the PDF button for testing.
- tasks_utf8.fo (tasks.fo, windows encoded): the FO-XSL file
exported from FO-Designer. This is the file you have to upload to Apex.

Load the XSL-FO file into Oracle Application Express
Now we will upload the XSL-FO file to be able to use it in Oracle
Application Express.
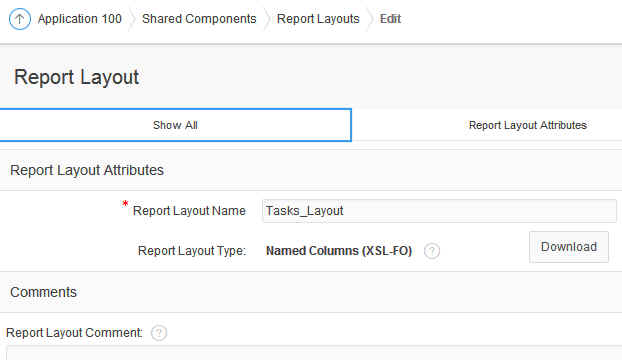
- In Apex main menu select Shared Components -> Reports ->
Reports layouts
- Click create
- Select layout type Named columns XSL-FO, click next
- Enter layout name TasksLayout and select the file tasks_utf8.fo
(use tasks.fo only if the utf8 verison does not
work), create layout
Now we assign the new layout to our report query:
- In Apex main menu select Shared Components -> Reports ->
Reports queries
- double click our query Tasks_Query
- in the report layout field select TasksLayout
- click apply changes
As this point you can click on the "test report" button and the
PDF report will be displayed. In the next section we will integrate this
operation in a html page using a button.
Run the report query in Oracle Application Express
In your Apex application:
- select create page and select blank page , enter
a name for the page and click next until the page is created.
- edit the created page and add a new region
- select Static content as region type, click next
- Enter a title for the region and click create
- add a button to the page, switch to the component view if you are not
in it and then edit the button. As Action select Redirect to URL
and enter the url of the report f?p=&APP_ID.:0:&SESSION.:PRINT_REPORT=Tasks_Query
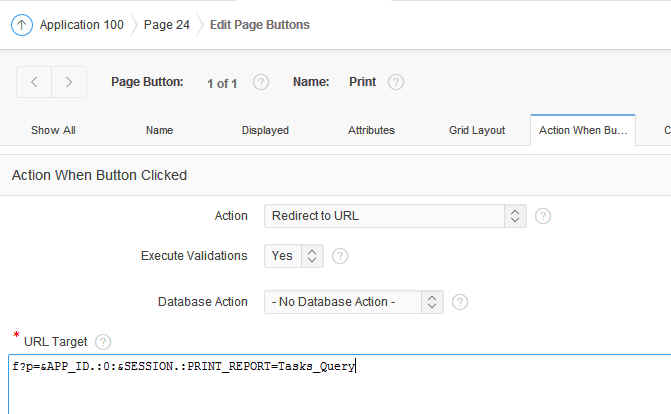
- click next accepting the default values until the "report query" field
is displayed, in this field you select the query "Tasks_query". Click create
button.
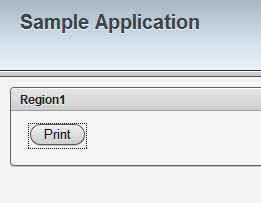
- Now you can run the page. The button will be shown, if you click on
the button the query "Tasks_query" will be executed and the PDF
file displayed.

Sending the PDF report as an email attachment
In order to send the PDF report as attachment you must use our J4L FOP
Server. If you use our FOP server the URL you use to create the report is
something like this:
http://yourserver/J4LFOPServer/Apex.
this URL creates a report which will be displayed in the client browser.
If you want to send the report as an email attachment you must use the
following items (page or application)
- prefix_J4LMAIL=1 to activate the email output.
- prefix_J4LMAILFROM: email address of the email sender (the default
value is "default@localhost").
- prefix_J4LMAILTO: destination email address.
- prefix_J4LMAILSUBJECT: mail subject (the default value is "PDF
report").
- prefix_J4LMAILBODY: text for the email body (the default value is
"Report attached").
- prefix_J4LMAILFILENAME: filename for the report PDF file (the default
value is "report.pdf").
- prefix_J4LMAILOK: html code to be displayed if email can be sent
successfully.
- prefix_J4LMAILERROR: html code to be displayed if email fails.
if you are using a report query the items will be application items with
the prefix F<applicationId>.
if you are using the printing option in a classic report, the items must
be page items with the prefix P<pageId>.
Configuration of the mail server
Before you can send an email from the J4L FOP server you must configure
the mail server information. If you are using J4L FOP server running you
must edit the following file:
installationdirectory\webapps\J4LFOPServer\WEB-INF\web.xml
in this file you will find these parameters:
<!-- smtp server for sending
notifications -->
<init-param>
<param-name>SMTPServer</param-name>
<param-value>localhost</param-value>
</init-param>
<init-param>
<param-name>SMTPUser</param-name>
<param-value></param-value>
</init-param>
<init-param>
<param-name>SMTPPassword</param-name>
<param-value></param-value>
</init-param>
<init-param>
<param-name>SMTPPort</param-name>
<param-value>25</param-value>
</init-param>
<init-param>
<param-name>SMTPAuth</param-name>
<param-value>NONE</param-value>
</init-param>
If your email server requires no authentication, you just need to modify
the servername and port name (see red values).
If your email server requires authentication you need to set the values of
the following 3 parameters:
- SMTPUser
- SMTPPassword
- SMTPAuth: to PLAIN or LOGIN
How to run the email report from APEX
Case report query.
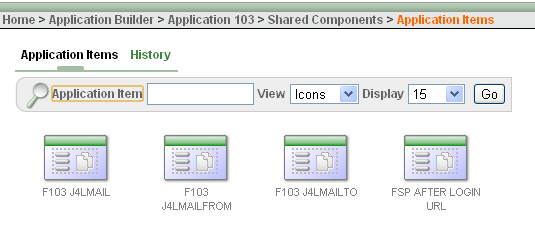
If you are going to use a report query, you first define the application
items required to send reports per email, in this example the application
Id is 103 and we create 3 items: F103_J4LMAIL, F103_J4LMAILFROM and
F103_J4LMAILTO
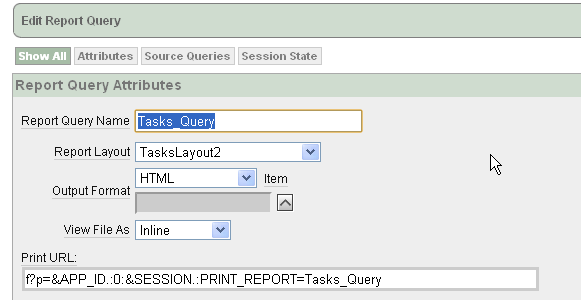
In the report query you specify output format HTML (inline) since the
email result output is in HTML format.
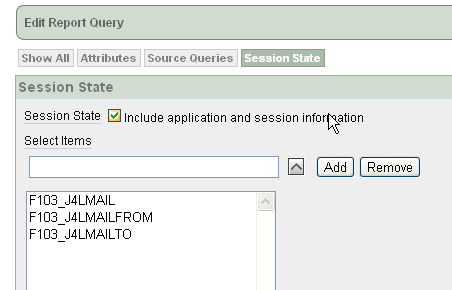
In the Session State tab you add the application items we previously
defined since the print server will need these items:
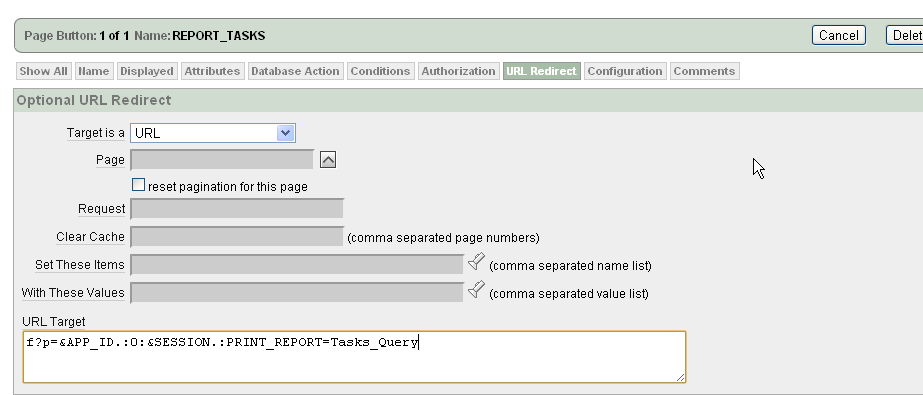
The last step is to set the application items values (for example using
computations) and call the report using the print URL.
You can call the report using a button and calling the print URL:
or you can also use a popup window if you do not want the user to exit
the current page:
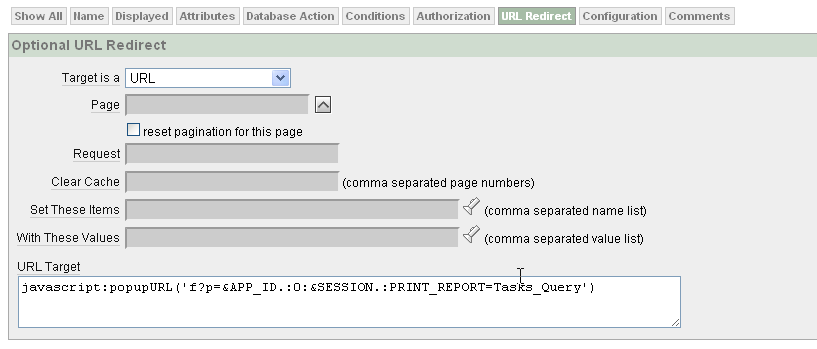
this second option will open a popup window to display the result of the
email transmission.
Case classic report.
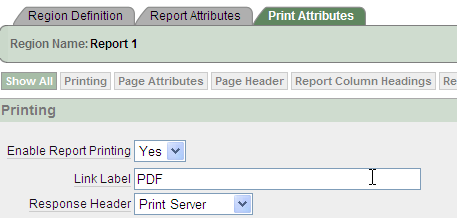
If you use the printing tab of the classic reports you have to define
page items, in the example the page Id is 8:
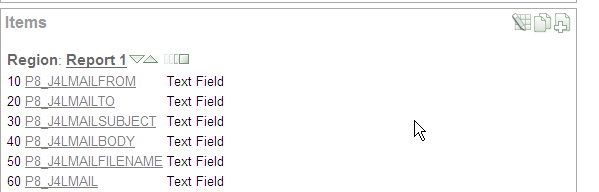
and set the response header field to "print server":
when you print the region, the PDF file be generated if P8_J4LMAIL=0 and
an email will be sent if P8_J4LMAIL=1.
You can run the report email transmission in the same way we explained
above.
How to set the PDF filename
In the previous section you can learn how to use application or page
items to set the configuration of the email. You can also use an
application or page item to set the filename of the PDF file created by
the print server. In this way the user can download the report as a PDF
file with a meaningful name. For example, if you want to print an invoice,
you can create a PDF file called invoice1020.pdf where 1020 is the
invoice number.
The way to do this is:
- Create an application or page item called <prefix>_J4LFILENAME
as drescribed in the previous section.
- Set the value of the item using an APEX computation in the report
page.
Adding a digital signature to your PDF
If you are using FO Designer version 1.4 or later you can add digital
signatures to your PDF files, however before you can do that you need to:
- read the digital signature section in the FO Designer user guide.
- request a certificate from a Certification Authority. You can also
create your own certificate with tools like openssl but in that case the
intended receivers of your PDF documents must add your own created
certificate to their list of trusted certificates. For testing purposes
you can use the certificate we provide in the certs subdirectory
of the FO designer distribution.
The digital signature in our FOP Server can be configurated in the
following way.You must edit the following file:
installationdirectory\webapps\J4LFOPServer\WEB-INF\web.xml
in this file you will find these parameters:
<!-- smtp server for sending
notifications -->
<init-param>
<param-name>P12File</param-name>
<param-value>c:\j4l_test.p12</param-value>
</init-param>
<init-param>
<param-name>P12Psw</param-name>
<param-value>test</param-value>
</init-param>
you have replace the red values in the example above with your P12 file
and your password. This example shows the configuration you would use if
you copy our j4l_test.p12 file to the c: drive.
With this simple setup our server has all the information to add the
signature to your PDF. The next step is activating the signature whenever
you create a PDF report. You can do this in 2 ways:
- In the print server script, instead of
using the:
/J4LFOPServer/Apex
you would use
/J4LFOPServer/Apex?SIGN=1
this option would activate the signature for all PDF files your create
- if you want to activate the signature only for certain reports you
would use a page item or an application item called J4LSIGN. For
example, if your page is P8 and your application has the id F103, you
could use any of these items:
P8_J4LSIGN=1 or F103_J4LSIGN=1
this can be done in the same way the email parameters
are setup.
Creation of a PDF interactive form
PDF forms can be used for collecting data from your business partners, here you can learn about a possible way to use it.
APEX can be used to create PDF forms which, for example, can be sent by
email to a customer. Each customer would receive a PDF form with her own
data.
PDF forms can be created exactly in the same way as regular PDF files.
The only difference is, when you design the PDF template using the J4L FO
Designer you have to define some fields as Input Fields. This
process is described in the user guide. At runtime the process is exactly
the same as described in this section.
ORDS testing in the designer
Starting with the designer 2.0 you can directly test the created report
directly with APEX ORDS. In the preferences window you setup the ORDS URL

and use this button for the test:

FAQ
Error in FOP Server while using default APEX layouts
"fo:simple-page-master, fo:region-body must be declared before
fo:region-before".
If you are using the J4LFOPServer together with Oracle APEX default
layouts you can get the error:
fo:simple-page-master, fo:region-body must be declared before
fo:region-before
This error is documented in Apache FOP, in the following page: http://wiki.apache.org/xmlgraphics-fop/Troubleshooting/CommonLogMessages.
Oracle APEX seems to be generating a XSL-FO file which does not adhere to
the XSL-FO specification. The solution would be to fix the XSL-FO file as
described in the URL.
However our J4LFOPServer version 1.5.4.1 or later will automatically fix
the APEX default layouts so that you do not have to worry about this
issue.
Error in FOP Server while using ascii extended
characters.
If you are going to use extended ascii characters (for example é ) or
other special characters ( < , >, " , \ or & ) in labels
of the report, you will have to activate the "Oracle APEX encoding" in the
FO Designer. This is located in the Administration menu, settings item,
process tab (FO Designer 1.5.4.1 or later).
This setting will encode the extended ascii characters using URL encoding
when you generate the FO file. This is required because APEX is failing to
encode these characters correctly when calling the print server at
runtime.
|